|
Integration with Task tracking codes is crucial for the best results and user experience. Once you've integrated the Task codes, you don't need to touch them again. Below we'll outline some helpful information you can use, but keep in mind your website code/script may require slightly different integration than our examples.
Task type
It's important to note that each Task type (login, read email, refer, etc.) requires individual integrations. You can track multiple types of activities depending on the type of website you are integrating. And, you only need to integrate the Task type once in to your website code.
For example, if your website is a membership service where you want to track each time someone logs in to their account, that requires a Task type labeled as 'Login to Account'.
Note: If there is a specific activity you wish to track but you don't see a relevant Task Type from the options, contact us so we can consider adding it as an option.
Task code elements
In the code string there are a couple things to note:
- If we need to troubleshoot while testing, the @ symbol can be removed (we only recommend removing for testing purposes) to help better determine bugs.
- The $jo_ui variable within the Task tracking code string is a very important piece of tracking Tasks properly to give credit to individual Participants of your Challenges
Integrating tracking code
Your website script & language could have multiple ways to integrate the tracking codes. Since we're not psychic and can't reach through the computer screen, below are the steps you should take.
Create Task
- Decide what kind of activity (Type) you want to track before you do any integration.
- When you're creating your first Task, be sure to select the specific Task type that you wish to use, and go fill in all the proper data.

- Get the code once you've finalized the Task. The code will look something like the following:
<?php $jo_error = @file_get_contents("http://jollow.com/tracktask.php?o=1&c=1234567&t=11&d=22&ui=".$jo_ui); ?>
Install code
- Make sure you know or have someone who knows enough about PHP coding as well as your file structure of your website. The tracking codes are designed to work with the PHP scripting language.
- Add the Task tracking code to a file or in a location where it will only be called at the completion of an action. For example, if it is 'Click Links in Emails', you will want to place the code in the file that recognizes an Email Link click so that the Task tracking code is called, sending Jollow a signal.
Define Unique Identifier
- It's imperitive that the $jo_ui variable be defined, and it can be done in many ways. You must define the Unique Identifier within the code of that page to tell Jollow which user we are tracking. Your script may have multiple options such as user ID, member email, affiliate #, or simply username.
- When you set up your domain, you were prompted to define the name of this identifier within the domain settings (which you can view at "Manage Challenges" > "Domains List" and then click "Edit Domain Settings"). It will look something like the following, except "Affiliate ID" will be labeled however you input the name that applies to your website.

- The tracking code needs to match the identifier label. In the above case, the variable on the website might be $userid (depends on the script of your website) which could be the same exact number as Affiliate ID. You would then define the variable as $userid - here are a couple examples:
- <?php $jo_ui=$userid; $jo_error = @file_get_contents("http://jollow.com/tracktask.php?o=3&c=5020574&t=43&d=5&ui=".$jo_ui); ?>
(Notice the $jo_ui=$userid at the beginning)
- <?php $jo_error = @file_get_contents("http://jollow.com/tracktask.php?o=3&c=5020574&t=43&d=5&ui=".$userid); ?>
(Notice we replaced $jo_ui with the variable of the website script instead)
Testing the Integration
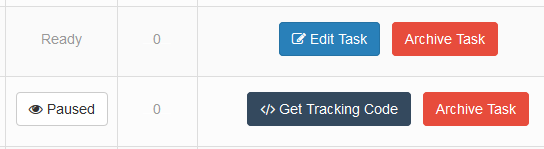
- After you've added the Task tracking code to your website, you can simply test the first part by performing the particular Task action. In the above example we used "Click Links in Email" as the Type of task. Now, you can go to one of the emails and click a link like a normal user of your website. Then, simply check your Task list in Jollow and you should see "Ready" next to that specific Task type. You can also click on the status box (such as Paused) to find out why it has that status.
- Create a Challenge with that Task and 'Take' the Challenge for yourself. Follow the on-screen instructions, entering in your Affiliate ID (or whatever the unique identifier is) when prompted, and save the details.
- Go to your website, perform the activity (such as clicking links in an email) and then you can check your Challenge stats to see if it's recording your activity. If so, you've successfully integrated the Task type!
Tips & Notes:
- Don't be afraid to contact us with questions - we're here to help make you successful
- Once you activate a Task type, you do not need to add the same Task type code again for that particular website
- There are popular scripts such as WordPress and we'll continue building articles to walk you through the steps for integrating scripts of that nature
| 